
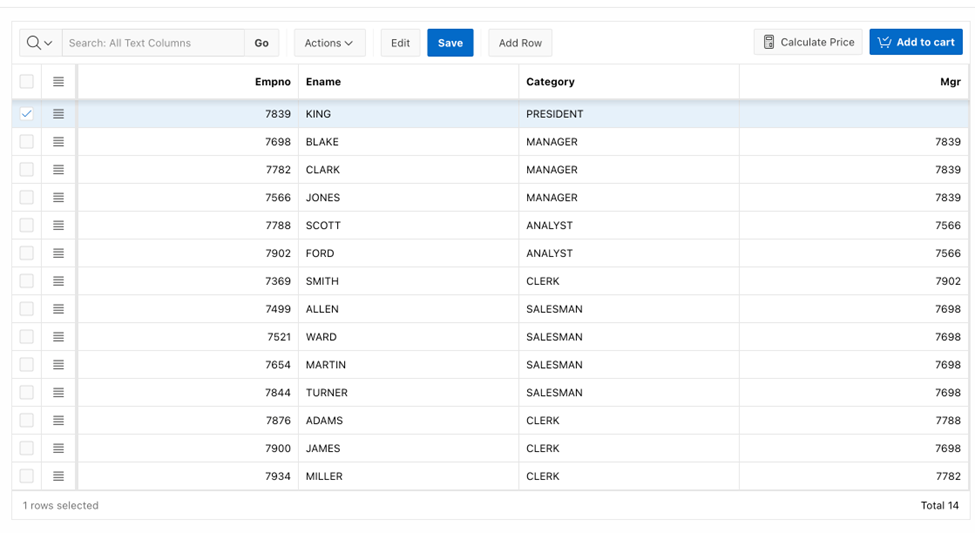
Have you ever wanted to set a custom button to add a new record or entirely new functionality on the bar of the interactive grid? APEX provides tools with JavaScript to add custom buttons or change the look and feel of the ones we already have. You can remove the reset button as well or change its position.
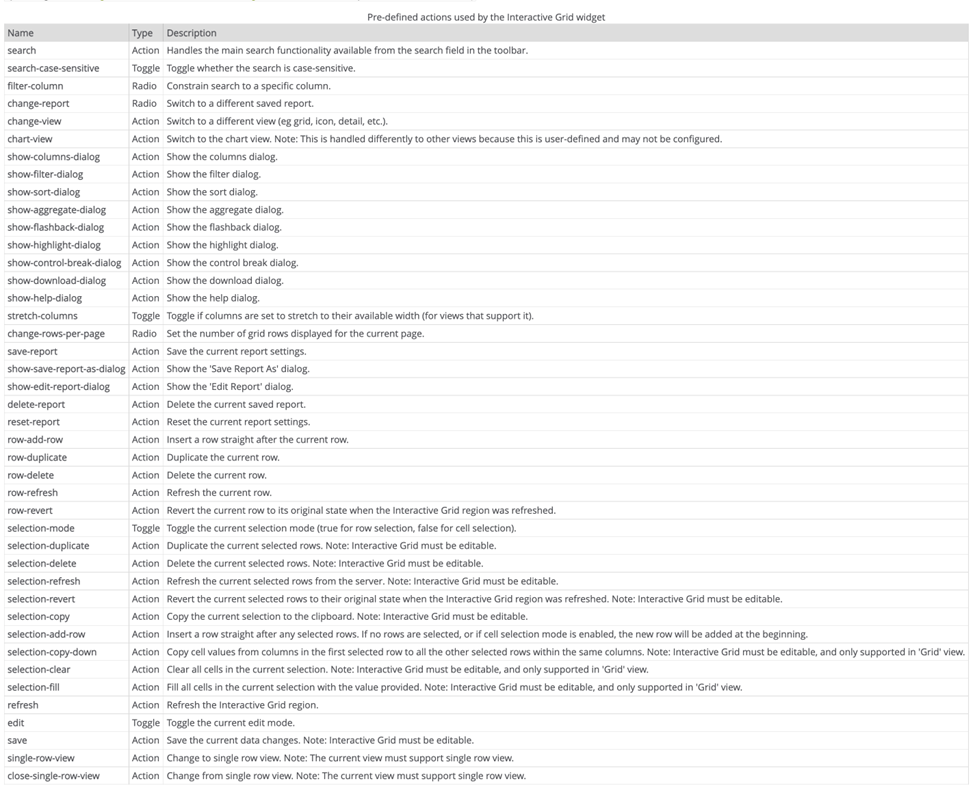
To start, let's look at how APEX splits the interactive grid bar. The bar has seven sections; here is a description of them. Keep this chart in mind since we will use it to assign our buttons.
|
Name |
Description |
|
All search controls (column search menu, search field and go button) |
search |
|
Saved report select list |
reports |
|
View selection pill buttons |
views |
|
Actions menu button |
actions1 |
|
Edit and Save buttons |
actions2 |
|
Add Row button |
actions3 |
|
Reset report button |
actions4 |
We will need the list of actions available for interactive grids that we can use for the buttons.
Now for the good part. How can you create your new buttons? For this, we need to use the initialization code on the interactive grid.
We will use the list of positions available on the toolbar to select where we want our button.
let $ = APEX.jQuery,
toolbarData = $.APEX.interactiveGrid.copyDefaultToolbar(),// get the toolbar of the interactive grid
toolbarGroup = toolbarData.toolbarFind("actions4"),// get the position where you want to place your button
toolbarViews = toolbarData.toolbarFind("actions3");
Now let’s create the buttons we want to add. On action, we can define one of the actions in the list above, or we can create custom actions as well.
let addCategory = {//Button with costum actions
"type":"BUTTON",
"action":"row-add-rowt",
"label":"Add category",
"hot": 'Y',
"icon": "fa fa-plus",
"iconBeforeLabel": "BEFORE_LABEL"
},
addCart = {//Button with costum actions
"type":"BUTTON",
"action":"add-cart",
"label":"Add to cart",
"hot": 'Y',
"icon": "fa fa-cart-check",
"iconBeforeLabel": "BEFORE_LABEL"
},
calculatePrice = {//button without Hot action
"type":"BUTTON",
"action":"calculate-price",
"label":"Calculate Price",
"icon": "fa fa-calculator",
"iconBeforeLabel": "BEFORE_LABEL"
};
Let's create the custom actions we will use, in this case, add-cart and calculate-price. You can add any custom JavaScript.
config.initActions = function (actions) {
actions.add({
name: 'add-cart',
action: function(event, focusElement) {
APEX.message.alert('add-cart')
}
});
actions.add({
name: 'calculate-price',
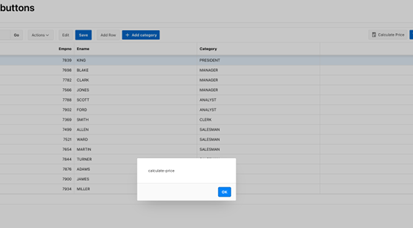
action: function(event, focusElement) {
APEX.message.alert('calculate-price');
}
});
}
In the end, you just need to assign the buttons to the toolbar in the position we want; that is all.
toolbarGroup.controls.push(calculatePrice);
toolbarGroup.controls.push(addCart);
toolbarViews.controls.push(addCategory);
config.toolbarData = toolbarData;
return config;
And this is how it looks.
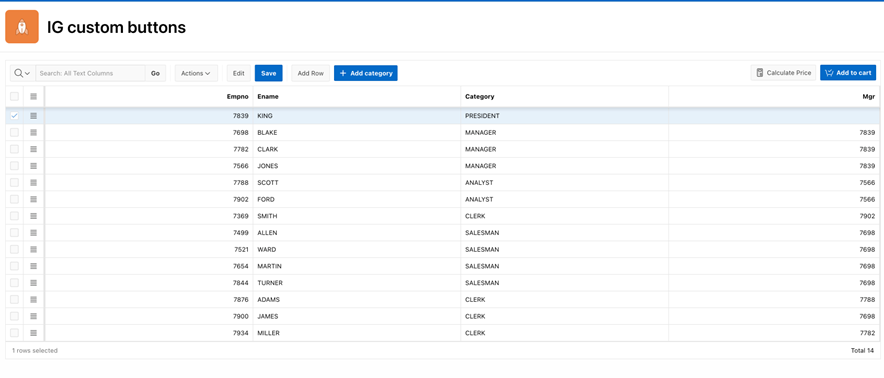
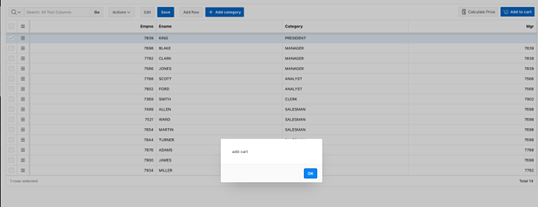
To summarize, we can reposition or add custom buttons to our interactive grid. How is this useful? It helps a lot if you want to use the information you have on the interactive grid for a process like "add to cart" or "wish to add" icons to the default functionality.
Something cool I use this for is the select records tool from the interactive grid and process the selected records with any action, assign items to a cart, approve a batch of items, etc.
Here is a snippet with the complete code.
function(config) {
let $ = APEX.jQuery,
toolbarData = $.APEX.interactiveGrid.copyDefaultToolbar(),// get the toolbar of the interactive grid
toolbarGroup = toolbarData.toolbarFind("actions4"),// get the position where you want to place your button
toolbarViews = toolbarData.toolbarFind("actions3"),
addCategory = {//Button with costum actions
"type":"BUTTON",
"action":"row-add-rowt",
"label":"Add category",
"hot": 'Y',
"icon": "fa fa-plus",
"iconBeforeLabel": "BEFORE_LABEL"
},
addCart = {//Button with costum actions
"type":"BUTTON",
"action":"add-cart",
"label":"Add to cart",
"hot": 'Y',
"icon": "fa fa-cart-check",
"iconBeforeLabel": "BEFORE_LABEL"
},
calculatePrice = {//button without Hot action
"type":"BUTTON",
"action":"calculate-price",
"label":"Calculate Price",
"icon": "fa fa-calculator",
"iconBeforeLabel": "BEFORE_LABEL"
};
toolbarGroup.controls.pop();
config.initActions = function (actions) {
actions.add({
name: 'add-cart',
action: function(event, focusElement) {
APEX.message.alert('add-cart');
}
});
actions.add({
name: 'calculate-price',
action: function(event, focusElement) {
APEX.message.alert('calculate-price');
}
});
}
toolbarGroup.controls.push(calculatePrice);
toolbarGroup.controls.push(addCart);
toolbarViews.controls.push(addCategory);
config.toolbarData = toolbarData;
return config;
}
Documentation


SUBMIT YOUR COMMENT